Good Structured Light Scanner for sub £150
In my ongoing mission to make everything in my life more prone to breaking by connecting them to Alexa i’ve come across multiple times where I’ve wished I could scan a part.
Now you can buy/make a 3D scanner off le interweb and the budget laser line ones come in at around £100. These give ok results but are really only meant for smaller objects. Also that all just seems a little too easy for my liking.
So I got myself a cheap second hand projector, a couple of cheap QHD CCTV cameras, a raspberry pi and endless indoor quarantine time. So I’m gonna attempt to build myself a 3D structured light scanner 👍
The Theory
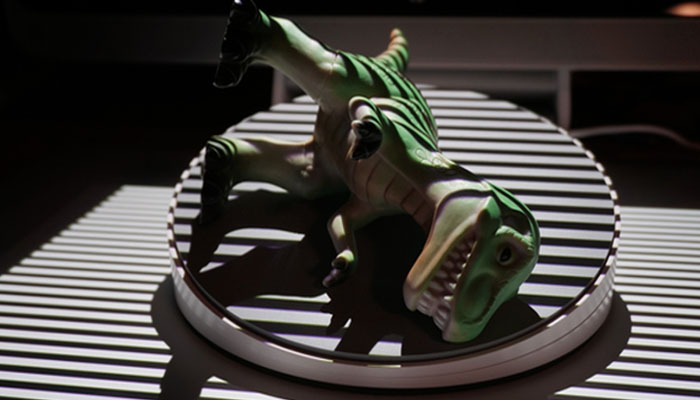
Basically we’re going use a raspberry pi and projector to shine gray code on to whatever object we want to scan and take a pictures of each sequence. Then we’ll rotate the part and repeat until we have images of every side of the object. We’ll then use the openCV library to remove the lens distortion, triangulate the data points and generate a point cloud for each rotation. Finally we’ll match up the scans taken at each angle with Mesh View to create one solid part.
Gray code is a series of black and white stripes that allows us to encode each column with a unique identifier so we know what column each pixel our object originally came from. We’re using this over traditional binary as it’s much less susceptible to noise. This is because any sequence of bits only ever differs by 1 bit i.e. 000, 001, 011, 010, 110, 100, 101, 111. This makes decoding our image less error prone as we can more easily detect when we’ve moved from one column to the next as we’re only looking for a single bit change.
Let’s Get Started
We’ll begin with the hardware as it’s the easiest bit and we’ll need it to do the rest! So you’ll need
- 2x Cameras
- 1x Raspberry Pi 3 Model B
- 1x projector (720p or better)
- 2x Tripod
- 1x Bit of wood
- 1x Selection of bolts and cable ties
- 1x Lazy Susan
I’ve also used a selection of 3D printer parts which you can find on my thingiverse page here.
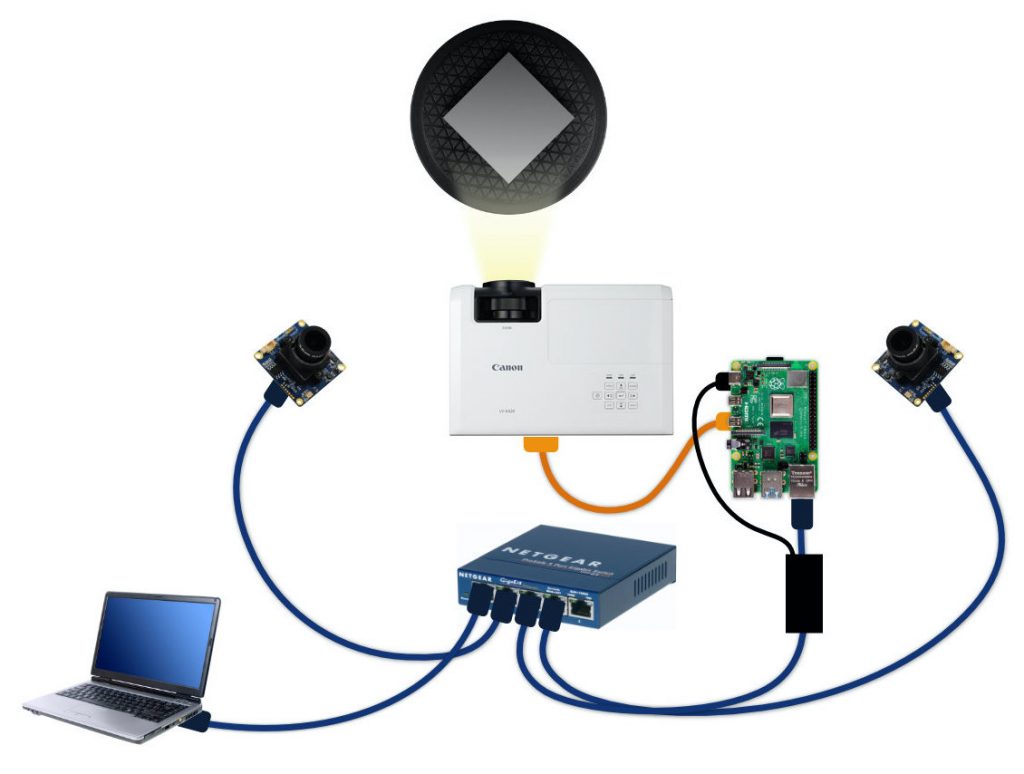
And here’s a rough schematic of what connects to what! Hopefully it’s fairly self explanatory and it will obviously vary depending on what components you’ve managed to source so I won’t go into anymore detail.

print("Hello, world!");Hello
Cameras
Having tried numerous cameras from POE IP security cameras to old digital stills cameras with video capture cards attached I’ve decided to use two high quality USB cameras from china. These have proper CS lens mounts and can take up to 5MP stills. I’ve gone with these as they provide excellent pictures are relatively cheap and are work without any setup on the raspberry pi.
https://www.aliexpress.com/item/32907404261.html?spm=a2g0s.9042311.0.0.1c864c4d50i8Pk
https://github.com/theICTlab/3DUNDERWORLD-SLS-GPU_CPU/blob/dev/README.md
https://calib.io/pages/camera-calibration-pattern-generator
http://boofcv.org/index.php?title=Tutorial_Camera_Calibration
https://github.com/jhdewitt/sltk
https://www.vision-systems.com/3d-imaging/article/14035114/how-to-develop-a-lowcost-3d-scanner-using-structured-light
http://citeseerx.ist.psu.edu/viewdoc/download?doi=10.1.1.21.5393&rep=rep1&type=pdf
Ollie
An electromechanical systems engineer with passion for all things technology, design and feline.


One Comment
Chet
Awesome stuff! Do you know where I can find a little more information on using a raspberry pi for 3dunderworld (documentation seems lacking for anything other than a dslr, and even that is scarce)? I’m quite deficient in my computer science knowledge. Thanks in advance!